


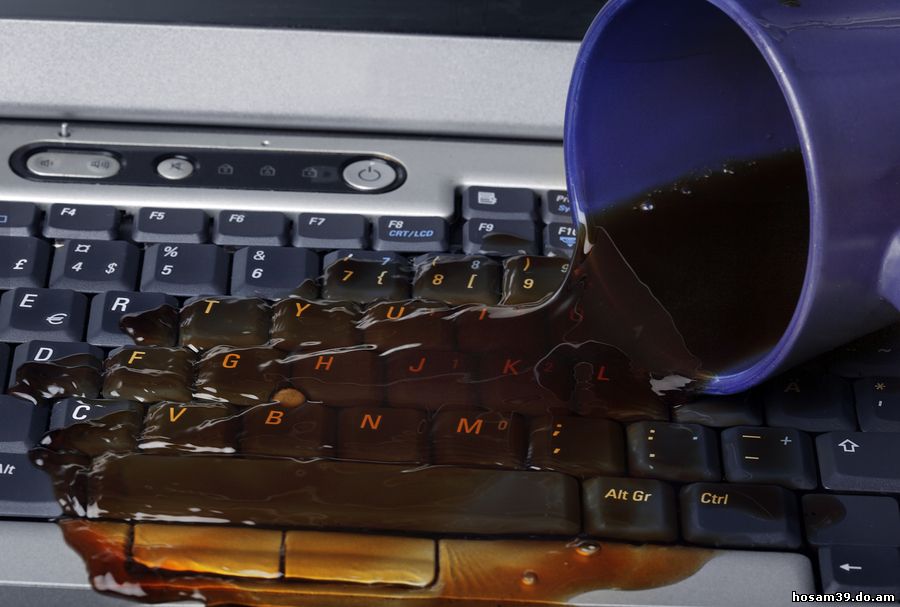
Basically any liquid containing sugar (soft drinks, beer, wine, coffee or tea) are bad news...
A couple of laptop keyboard repair do’s and don’ts in the event of a spill..

DON’T panic. Panic makes us do stupid things, think before you react.
DON’T use a hairdryer to dry out a spill...melted keys are hard to type with.
DON’T tilt the machine upside down or on its side (if you do feel the need it's better to tilt it to the side that houses the CDROM as the CDROM area inside the machine has less components on it than the mainboard).
DO switch the machine off immediately and resist switching it back on until you're certain the spill has dried. Survey the damage after you've dried it out. At this point you could remove the keyboard and try the machine using an external keyboard to see if anything else has been affected.
This diagram shows what a basic keyboard looks like, the ribbon cable which connects the keyboard to the motherboard is indicated by the red arrow.

The ribbon cable can also be located on the front edge of the keyboard depending on the age and model of the laptop you have.
Note the keyboard holder (thin strip of plastic) that sits on the top edge of the laptop keyboard needs to be removed to get access to the screws holding the keyboard down.
Most of the current laptop keyboards are like the diagram below.

Traditionally a spill will kill a keyboard or at best at least some function will be lost. I have only ever been successful
with a laptop keyboard repair that involved a water spill, anything else normally results in a tragic loss and putting your old faithful keyboard to rest.. RIP.
How to replace a laptop keyboard
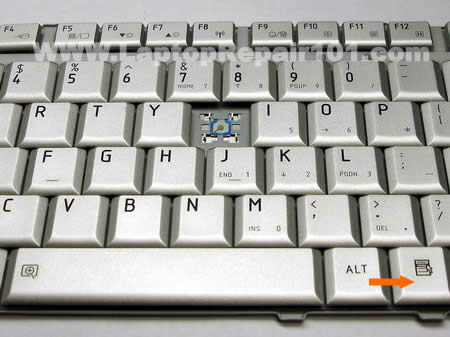
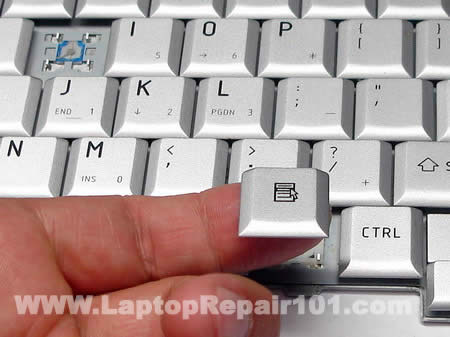
Keyboard removal is relatively simple, most keyboards are held in place with a couple of screws, and in some models, also a couple of screws thatmay need to be removed from the base of the unit. A quick call to your local authorized laptop computer repairer should help to determine
what screws need to be removed (if they know their stuff).
The keyboard connector is something that needs a little care when unplugging, if you are too heavy handed and damage the connector in any way you may even damage the mainboard also which can cause a world of pain.. be careful.
See below for the most commonly used connector.

The refitting of the keyboard once cleaned or replaced is just done in reverse.
Broken off some keys??
Whoops, these are a difficult one to fix and once again often end in having to replace the keyboard entirely. Some very small plastic mountingarms hold the keys in place and are often broken, either that or the little clips that the mounting arms click into break.
It's handy to have or get a hold of an old keyboard of the same type in order to poach the parts you need.
You may need some tweezers and a steady hand to fix these. The best thing I can suggest is to gently remove one of the other keys to see exactly how the mounting arms sit, once you have an idea of how it should look grab those tweezers and be patient, it may take some time.
We will soon have some detailed photos showing how these are assembled, until then remember to be patient and gentle.
If you seek professional advice regarding your laptop keyboard repair, the repairer will probably try to sell you a new keyboard complete with hefty
lab our charge to fix this for you. With the tips we have given you here, you can do your own laptop keyboard repair, fit it yourself and pocket the savings.
A key fell off the laptop keyboard. Fixing the problem.
One or more keys fell off the laptop keyboard and you are not sure
how to put them back? Don’t worry, most likely you can fix the keyboard
and it’s not necessary to buy a new one. There is no universal repair
guide because all keyboards are different. Here’s what I usually do in
this case.
Situation 1. The key cap and key retainer fell off the
keyboard and you cannot figure out how to assemble them back.

Carefully remove the cap from any other working key so the key retainer stays connected to the keyboard.


Assemble the disconnected retainer the same way as one on the
keyboard and put it back in place.
Put the key cap on the retainer and snap the cap back in place.
Situation 2. The key fell off the keyboard and you
lost the cap or the retainer. In this case you can purchase a single key
here, just search for it.
(Search examples: "Dell keyboard key”, "Toshiba keyboard key”, "HP
keyboard key”, etc… )
After you found a new key, put it back in place the same way as I
described in the situation 1.
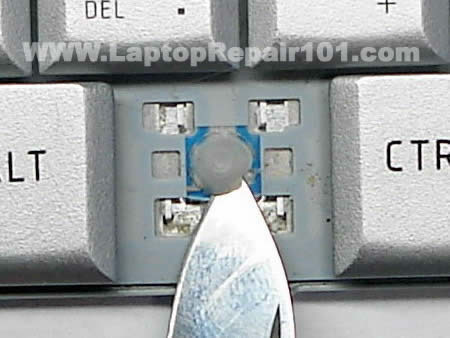
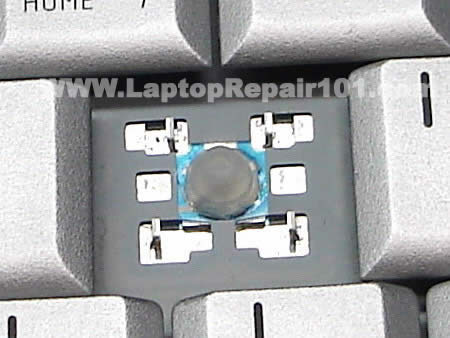
Installing the space bar key.
The space bar key is connected to the keyboard a little bit differently then any other key.

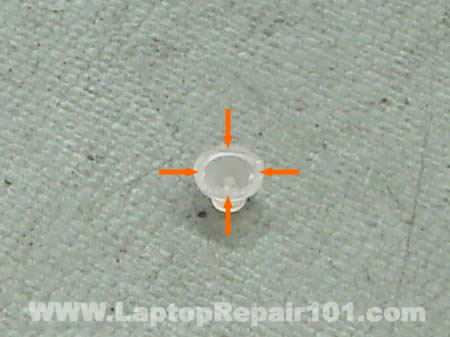
There is a metal retainer connected to the space bar key (on some keyboard models). Separate the retainer from the space bar key with a flathead screwdriver.

Install the retainer back in place as it shown on the picture. You have to engage the retainer with the small hooks on the keyboard.

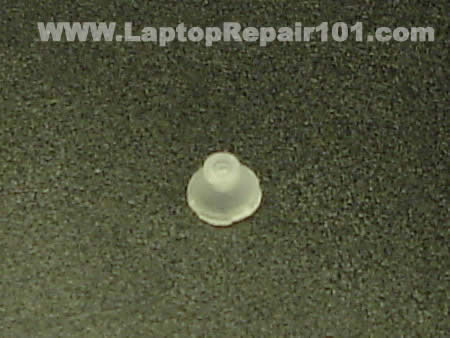
Put the space bar key back in place and gently press on it with fingers until it snaps back in place.

That’s it. The space bar key is installed back in place and should work as before.
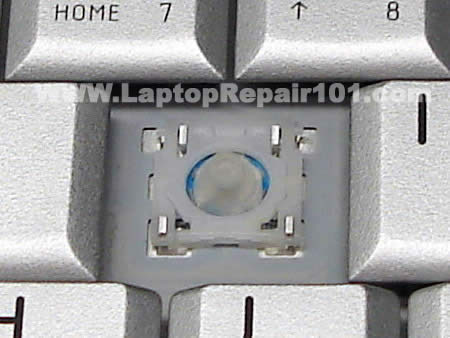
Here’s another technique you can use to fix a broken keyboard key.
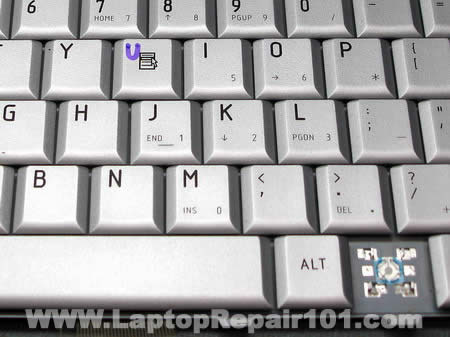
As you see on the picture below the keyboard is missing the U key. The key cap, retainer and even silicone membrane were lost. Let’s see if it’s possible to temporarily fix the U key without buying any spare parts.
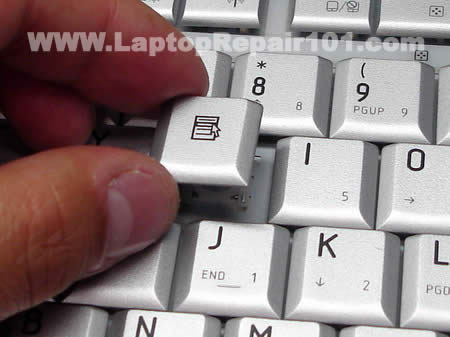
Personally, I cannot use keyboard without U key but I can live without a key located on the side from the right ALT, I’m not even sure what this key does. In the following guide I will remove the useless key and install it in the place of missing U.
Carefully remove the key cap with your fingers.
Remove the retainer. The retainer has two pieces connected to each other. If one piece got disconnected from the other, connect them back together.
The silicon membrane is glued to the keyboard. Very very slowly
separate the membrane from the keyboard with a sharp knife. While
creating this disassembly guide I damaged one membrane because I wasn’t
careful enough.
Again, you have to be very careful removing the membrane.
If you damage the membrane you’ll end up with two broken keys instead of
just one.
The silicon membrane has been removed.
Now apply some superglue on the bottom edge of the membrane, just enough to keep the membrane in the place.
Carefully place the membrane in the center of the U. Make sure the membrane is positioned correctly. Wait until the glue cures.
Install the retainer.
Position the key cap above the retainer. Gently press on the key cap until it clips in and connects to the retainer.
Now you can use the U key again.
Troubleshooting. Why the key will not clip on.
Turn the key upside down and take a closer look at the locking clips. It’s possible that one of the clips is damaged and because of that the key will not clip on the retainer. If that’s the case, you’ll have to purchase a new key.

On the next picture you can see that one of the clips is missing, it’s broken. This key will not stay connected to the retainer either. If that’s the case, you’ll have to purchase a new key.

It’s possible that the key is fine, but the retainer itself is
broken. On the next picture you can see that one of the tips is missing
on the retainer. The left tip is OK,
but the right one is missing. If that’s the case, you’ll have to purchase a new retainer.

Here’s one more picture. In this case two parts of the retainer will
not stay connected to each other. It happens because one of the tips is
broken.
The left tip is OK, but the right one is missing. If that’s the case, you’ll have to purchase a new retainer.

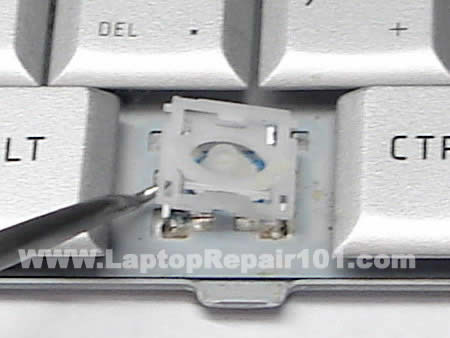
fix a broken keyboard connector on a laptop motherboard.
This guide explains how to fix a broken keyboard connector on a laptop motherboard. I do not claim that my instructions will work for any connector type in any laptop brand, but if I can help a few people, I can call my mission accomplished.
Let’s say the keyboard in your laptop stopped working properly and you decided to install a new keyboard yourself. You disassembled the laptop, removed the keyboard, tried to unlock the keyboard connector and… OHH! MAN!… a piece of the locking clip on the connector got broken!
What can you do? Unfortunately, you don’t have a lot of options. The keyboard connector is permanently soldered to the motherboard and cannot be replaced at home. If the connector was damaged, you’ll have to replace the whole motherboard, use the laptop with an external USB keyboard, or…. try the following trick. Hopefully it works or you.

The keyboard cable is locked inside the connector on the motherboard.
In order to remove the keyboard,
you have to unlock the connector and release the cable.
On the picture below you see one of the most common connectors. It has the base (white in my case) and locking clip (brown in my case). The keyboard cable is jammed between the locking clip and base.
To unlock the connector, you have to move the locking clip about 2 millimeters in the direction shown by two yellow arrows.
IMPORTANT! The locking clip must stay attached to the connector base.
After that you can pull the keyboard cable (green arrow) and remove the keyboard.

If you are not careful enough, you can move the locking clip too much and break it.
On the picture below you can see the locking clip is missing the left hook.

On the next picture both sides of the clip are broken.

IMPORTANT!
Do not though away the broken clip even though it looks
completely useless.
If you insert the cable into the connector and will not lock it with a clip, the cable will not make good contact with pins inside the connector and the keyboard
will not work.

Here’s how to install the broken clip back in place and make it work.
Position the broken clip the way it was before. In my case both sides of the connector are broken. What could have been worse?

Carefully insert the keyboard cable into the connector. Note, in this type of connector, the cable goes above the locking clip.

Carefully push the broken clip back in place. You can use a small screwdriver to push on the clip behind the cable.
The clip fits tightly when there is a cable inside the connector.

Secure the connection with sticky tape and you should be good to go. The keyboard should work just fine.

The keyboard connector shown on the following picture is very similar to the previous one. The only difference – the keyboard cable is routed under the locking clip. Fix it the same way as the previous connector.

On the next picture you see another type of keyboard connector. The cable is inserted vertically.

In order to unlock the connector, you’ll have to move the locking clip (brown piece) about 2 millimeters up in the direction shown by two yellow arrows. After that you can pull the keyboard cable (green arrow) and remove the keyboard.

If you move the locking clip too far, you can break it.
In my example the right side of the clip is broken. But you still can use it!

Insert the keyboard cable into the connector, position the broken locking clip correctly (behind the cable in my case) and carefully push it in.
Even with a broken clip the cable will make good connection with the base and the keyboard should work.

Here’s the same connector shown from the opposite side. You cannot even tell if the locking clip is broken.


